

Make Your Own Pastels
I only make one kind of pastel, and that’s made with pure Prussian blue. This particular blue is a feature of my still life paintings as the background. I like to make my own blue sticks because the commercial pastels have either clay or chalk or black pigment in them to extend the Prussian blue pigment. I need large areas covered with the darkest of dark blue. So it makes sense and takes only a little time, to do a batch of 20-30 sticks and this happens once or twice a year. Other than that I find it not a productive use of my time to make pastels.
I bought a muller from the art supplies shop, but the slab that was supplied with it was far too small. I went to a glass shop to get a bigger piece cut. It needs to be piece of 6mm glass with an etched surface, but a large piece only costs twenty dollars, much cheaper than an art supplies shop. Ask the glass shop to blunt the edges so it’s not dangerous to handle.
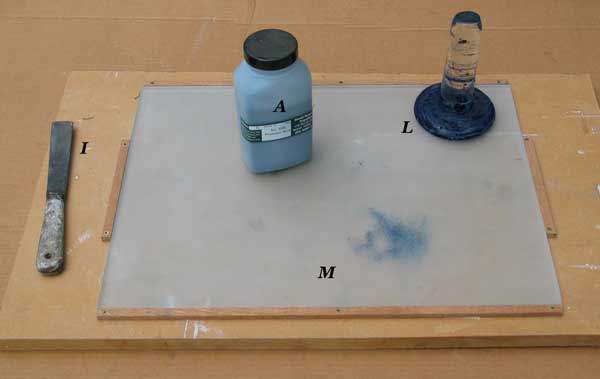
A. Pigment, M. Etched slab attached to its holder, L. muller, I. Palette knife for handling powder.
Preparation
Write down notes in a book detailing how you make each batch of pastels, as it will probably only be done 6 monthly or yearly. Don’t risk making the same mistakes over and over.
Since making pastels, is a fairly messy business, you need to have everything ready before you start. I have a box where I keep most of my tools which I use just for making pastels. Once you have blue pigment on your fingers, you can’t go poking around find a tool that you haven’t got ready. Most of my tools are seen in the illustration below. Disposable gloves are a necessity, and multiple pairs will be needed. Prussian Blue is non toxic, but with other pigments there may be health dangers in getting the pigment on your skin.
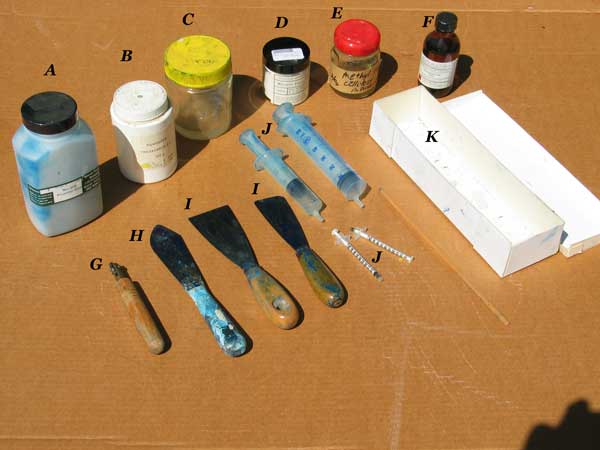
A. Pigment, B. Gum Tragacanth powder, C. Gum Tragacanth solution 1 in 50, D. Methyl Cellulose powder, E. Methyl Cellulose 1 in 50, F. Preservative (isothiazolinon) G. Pastel marking tool, H & I, various spatulas. J. big & small syringes, K. box for tools
Binders
Binders used for making pastels include gum tragacanth or methyl cellulose. I try to use two different binders when making pastels, so that if one goes wrong, you still have pastels to go on with. Besides that, I’m always searching for softer pastels, and that’s why each time I try to work out which binder is best and make small modifications to my formula. Each pigment has different characteristics, so you need to be open to change and get just the right amount of binder for each pigment you use. The weaker the concentration of binder, the softer the pastels, but if insufficient binder is present the finished sticks will crumble when used and end up on the floor. The information given below may only be relevant to Prussian Blue.
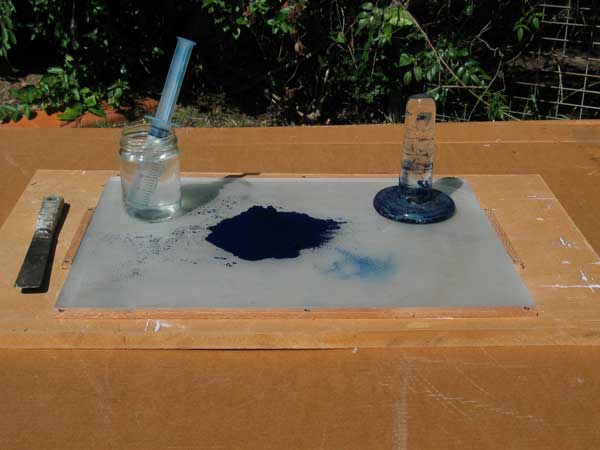
Powder, binder (which is also the grinding solution) & muller
Measuring
Most books say, “Dissolve one gram of powder in fifty millilitres (mls) of water.” Since you can’t easily measure out one gram, I use one ml of the power which can be easily measured, if you can get hold of small syringe and cut the end off. Similarly, the easiest way to accurately measure a hundred mls of water is with a large syringe. For both of the binders I make up the stock solution of one ml of powder in fifty of water and a half ml of preservative is added, this solution will last for years. Each time I make pastels I take five mls of this solution and dilute it with ninety five mls of water. That is for the gum tragacanth, but for methyl cellulose I use fifteen mls of this solution diluted with ninety five mls of water.
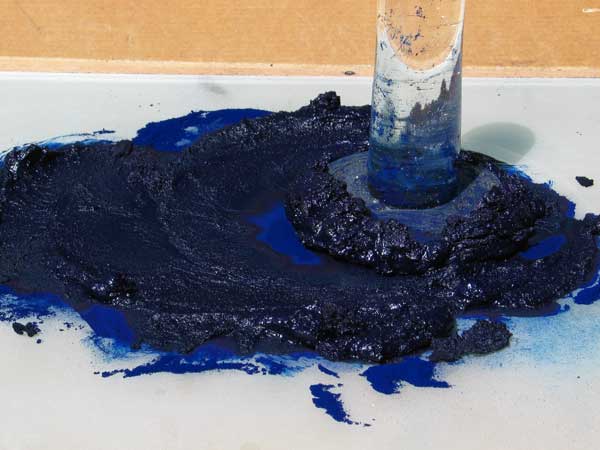
Keep the paste the consistency of mud.
Grinding
Once everything is ready, and the solutions are made up, I put gloves on, and pour out the pigment powder and add enough binder to make it wet enough to grind it on the slab. Grind the pigment wet for health’s sake and be careful not to cause a large puff of airbourne pigment when adding the binder. The photographs are taken outside for clarity, but in practice, you need to clamp the slab to a desk, so as to use both hands on the muller as is shown in the illustration. Add just enough water to form a paste and use a pallet knife to spread the paste. The time taken in the grinding depends upon the pigment. Experiment, if the finished pastels end up with gritty bits which cut into the surface when you are painting, then you will have to grind more next time. Start off with five to ten minutes.
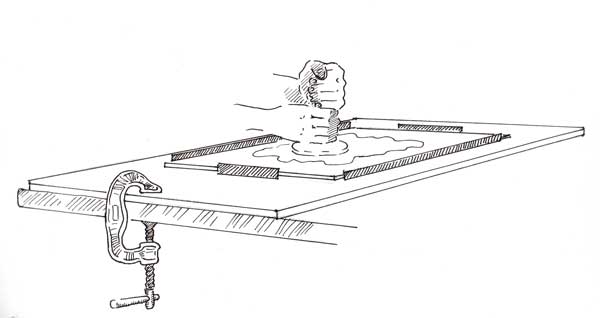
When buying a muller make sure it is big enough for two hands.
Blending
I don’t do this myself but I believe the procedure is, make a batch with the pure pigment, use half to make pastel sticks. With the other half blend it with an equal amount of filler (chalk, clay etc) and take half to make pastels and use the other half to mix with an equal amount of filler. Repeat this until you have a series down to almost white.
Rolling
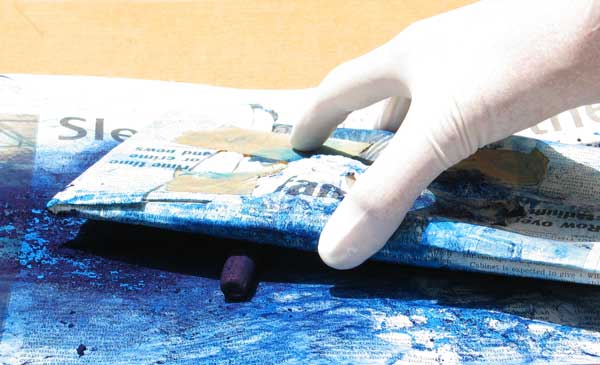
Once the paste is ready, cut off thumb-size chunks and roll them on paper with a piece of mat board dressed in paper. This gives the pastels an even size and the paste doesn’t tend to stick to the paper so you lose almost none. Don’t handle the paste with your gloves, it will stick to them and causes a great waste of pastel. Don’t roll too long as the paste has a habit of rolling hollow and the resultant sticks are hollow, really fragile and almost useless for painting with. I mark along the side of one of the batches with a rolling tool that I found in the flea market. Its real use is for leatherwork (I think) but any pressed mark will do. The mark should go the length of the pastel because the full sticks end up as thumbnail-sized pieces in no time at all. It is possible to continue to improve the finished product if it is marked and you keep careful written notes of how it was made.
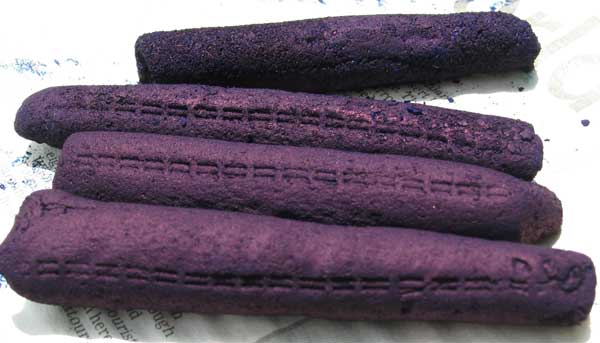
Pastel batches are identified with the marking tool G (shown in tool illustration) The pastels look a funny colour because I’ve heavily overexposed so as to see the markings.
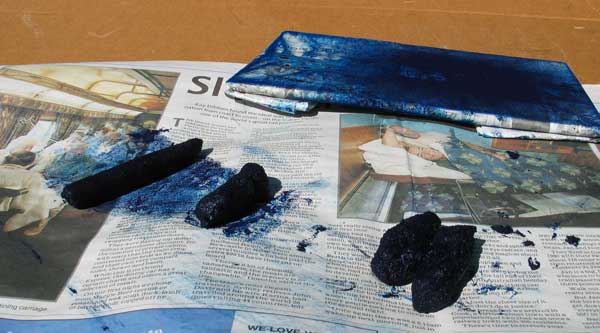
Drying
Carefully pick up the rolled pastel and put it on a piece of newspaper, rolling the pastels over after 24 hours so they dry evenly. They are really fragile at this stage but after about a week they are ready for use.
If you have any comments or suggestions on my method, please contact me.